If you’re anything like me, stepping into Dewlight Pavilion in Honkai: Star Rail for the first time felt like walking straight into a fever dream designed by Sunday himself. The golden corridors, the shifting 3D rooms, the Sandpit that teleports you into a dystopian playground — honestly, it’s like the devs woke up and chose chaos. But fear not, Trailblazers! After sinking way too many hours into this zone (and maybe rage-quitting once or twice), I’ve mapped out every single collectible, puzzle solution, and tricky dialogue choice so you can waltz through like Aventurine on payday.
Let’s get one thing straight: there are 28 treasure chests scattered across Dewlight Pavilion, plus a Warp Trotter and two snobby Lordly Trashcans that would love nothing more than to waste your time with a fight. We’re gonna snag them all without breaking a sweat. I’ll walk you through the normal rooms first, then we’ll dive into the Sandpit City, finally wrap up with both 3D rooms — the small one and that monstrous eastern chamber that requires the Outsourcer mission. Stick with me.
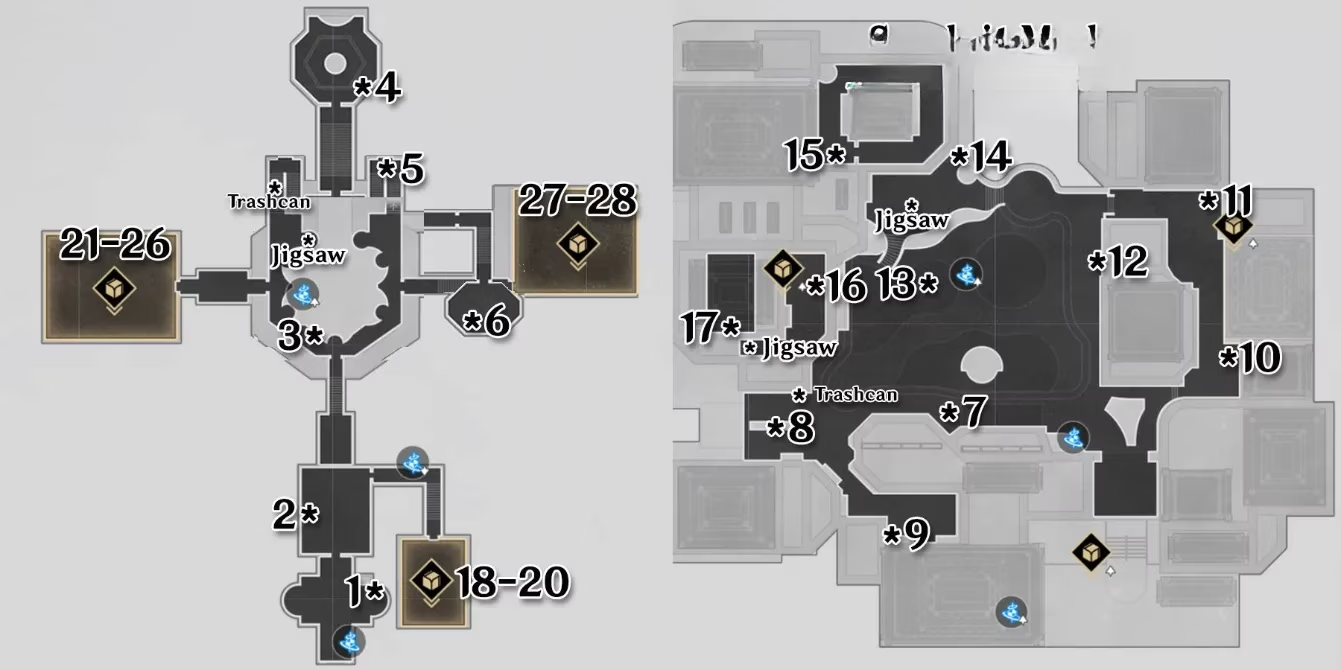
🏛️ Normal Area — Chests 1 to 6
Start at the Reception Counter Space Anchor — you can’t miss it. Right next to you is Chest #1, just waiting to be opened. Head north and peek behind the statues to your left; Chest #2 likes to play hide-and-seek there. Keep going north through the doorway, then immediately turn left. Boom, Chest #3.
Now for the first brain teaser: right near Chest #3 there’s a jigsaw puzzle. Complete it (no sweat, it’s simple), then descend the stairs. Here comes the first Lordly Trashcan. When it starts yapping, choose option 2 for both questions. Yes, even if you want to punt it into the next star system, being polite avoids a battle and saves you time. After that little chat, head north into the large hall for Chest #4, then check under the staircase on the opposite side for Chest #5. Finally, run east then south to snatch Chest #6. Easy peasy.
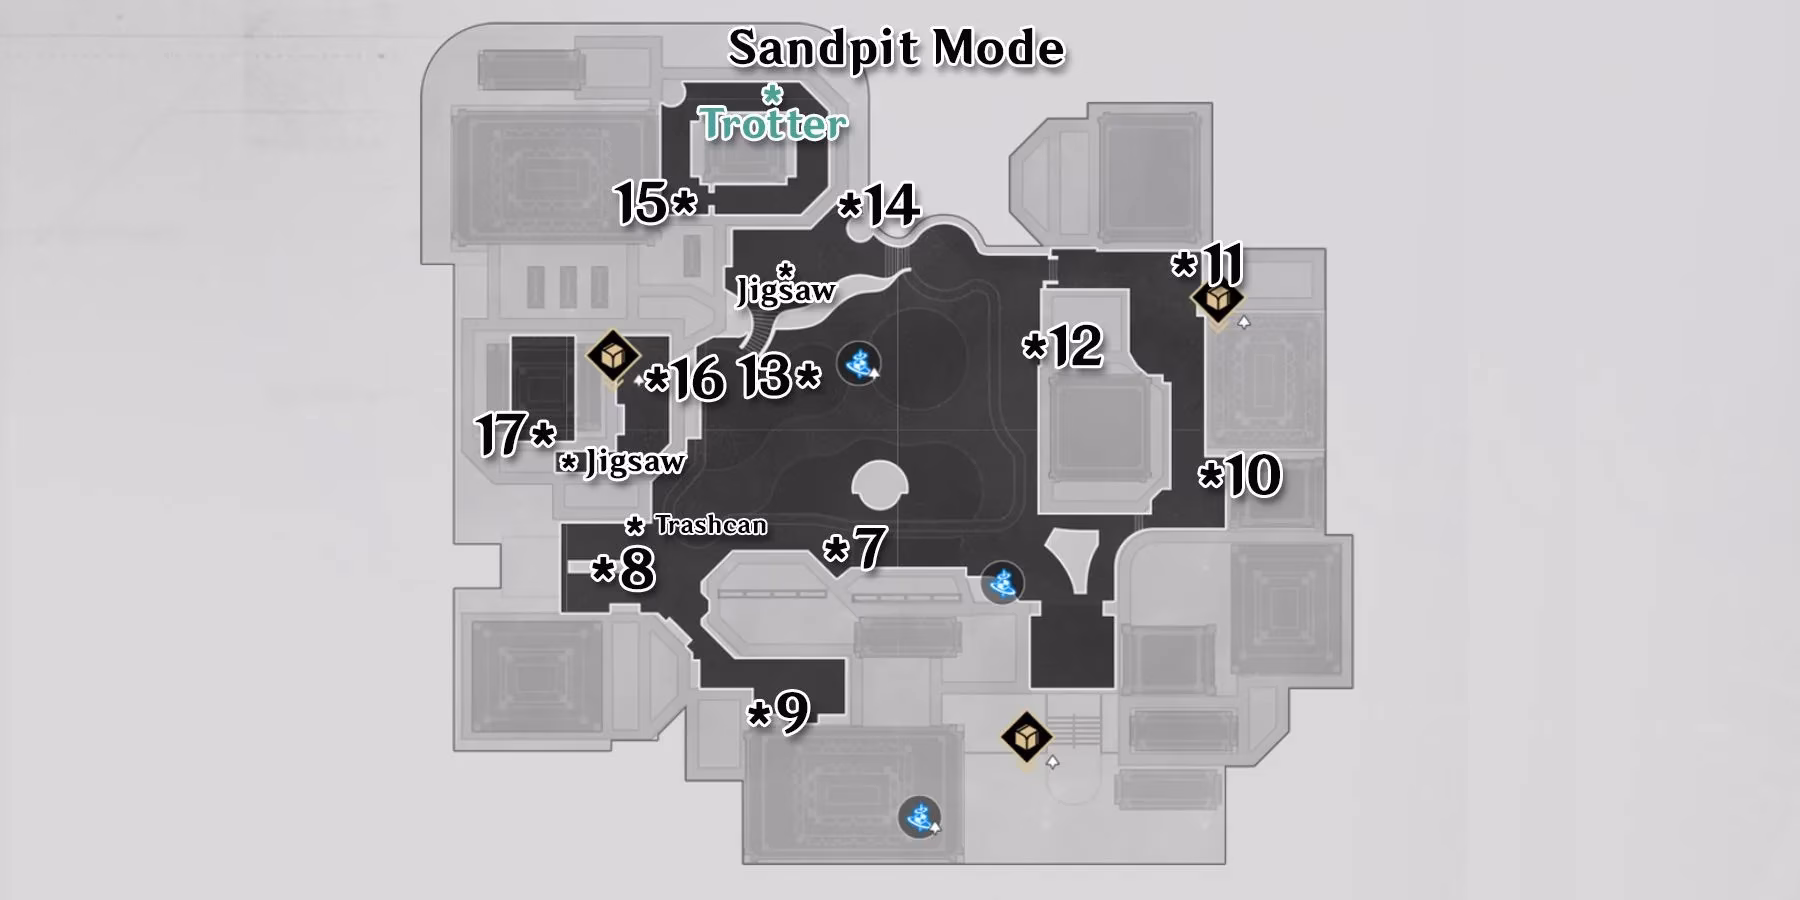
🏜️ Sandpit City — Chests 7 to 17 & Warp Trotter
From the normal area, head into the Dreammaster Hall and step into the Sandpit. Yes, the ground literally swallows you into a grimy urban maze. First thing’s first: activate the City Sandpit Space Anchor. Turn left for Chest #7. Walk west and you’ll bump into the second Lordly Trashcan. Again, choose option 2 for both prompts to skip the fight. Chest #8 is just a bit south of this trash-chested menace.
Now locate the Shape of Ire boss room — Chest #9 is nearby, hard to miss. Warp back to the Sandpit anchor, then go right and north to discover Chest #10. Continue north into a corner to find Chest #11. Exit the alley and head south for Chest #12, then west for Chest #13. Climb the stairs nearby, solve a jigsaw puzzle, and Chest #14 is yours.
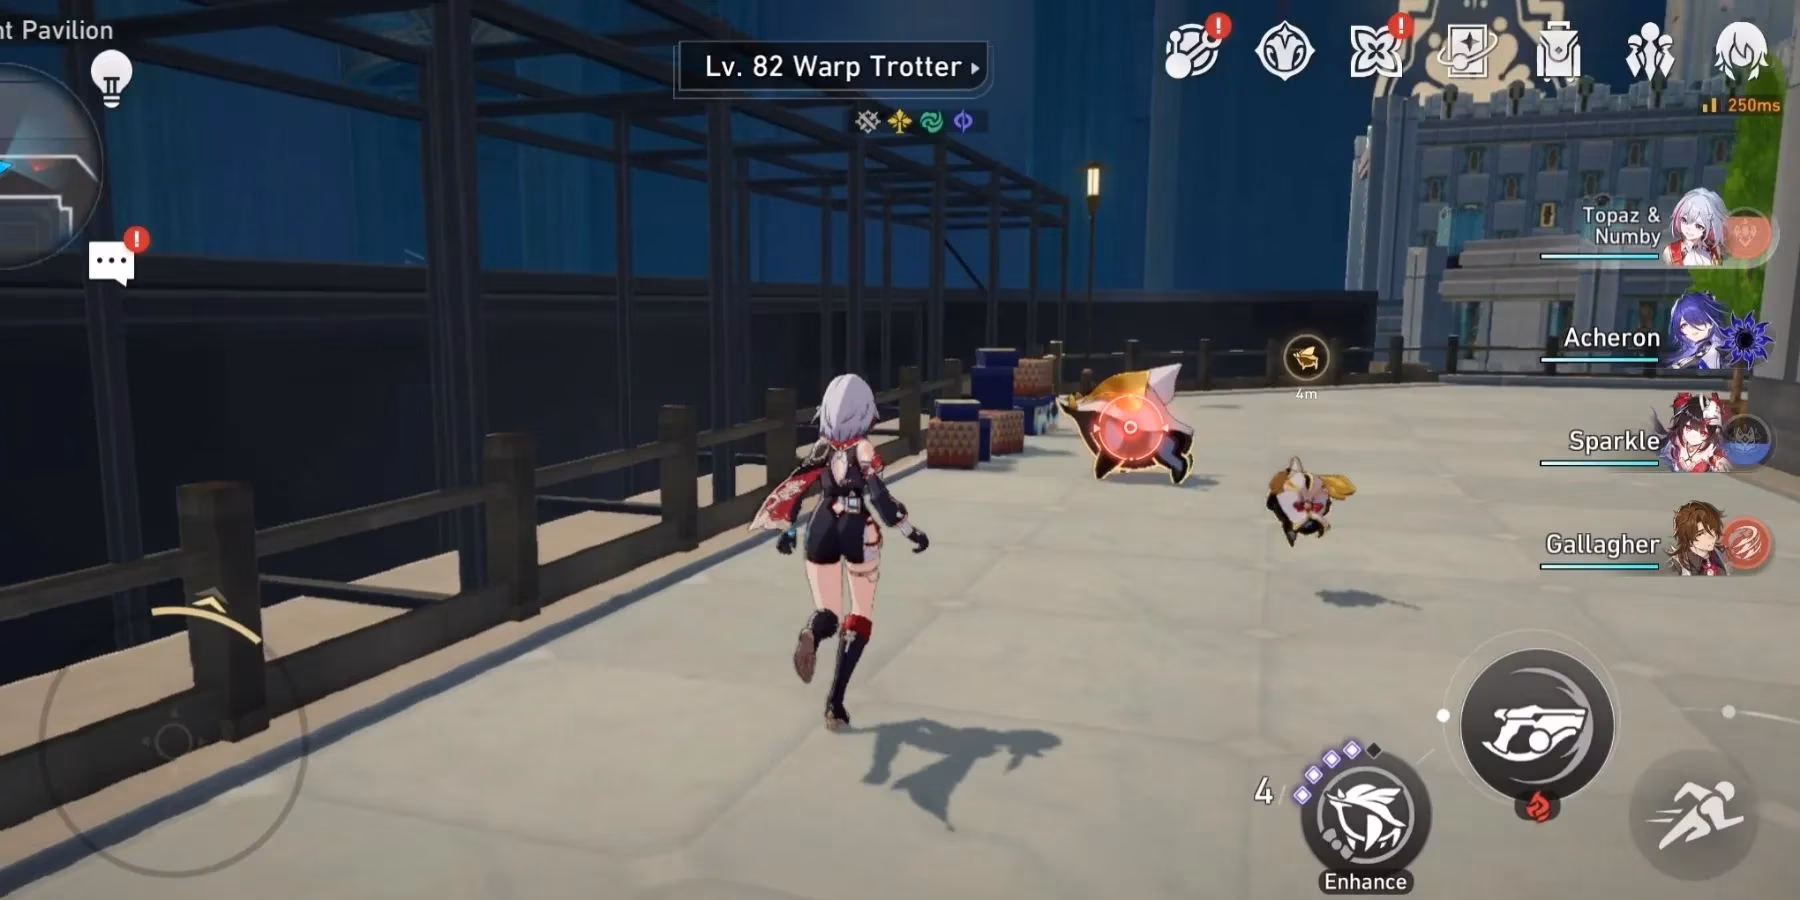
This is where the infamous Bubble Pinball machines enter the picture. Between Chest #12 and #13, there’s a Bubble Pinball. Use it to launch yourself to the upper platform where the Warp Trotter is chilling — yep, the little piggy that screams and runs. Defeat it (quickly, before it escapes), then claim Chest #15. After that, you’ll spot another Bubble Pinball right next to Chest #15. This single machine can actually lead you to two more chests if you adjust its trajectory. Tinker with it to reach Chest #16, then again to reach Chest #17.
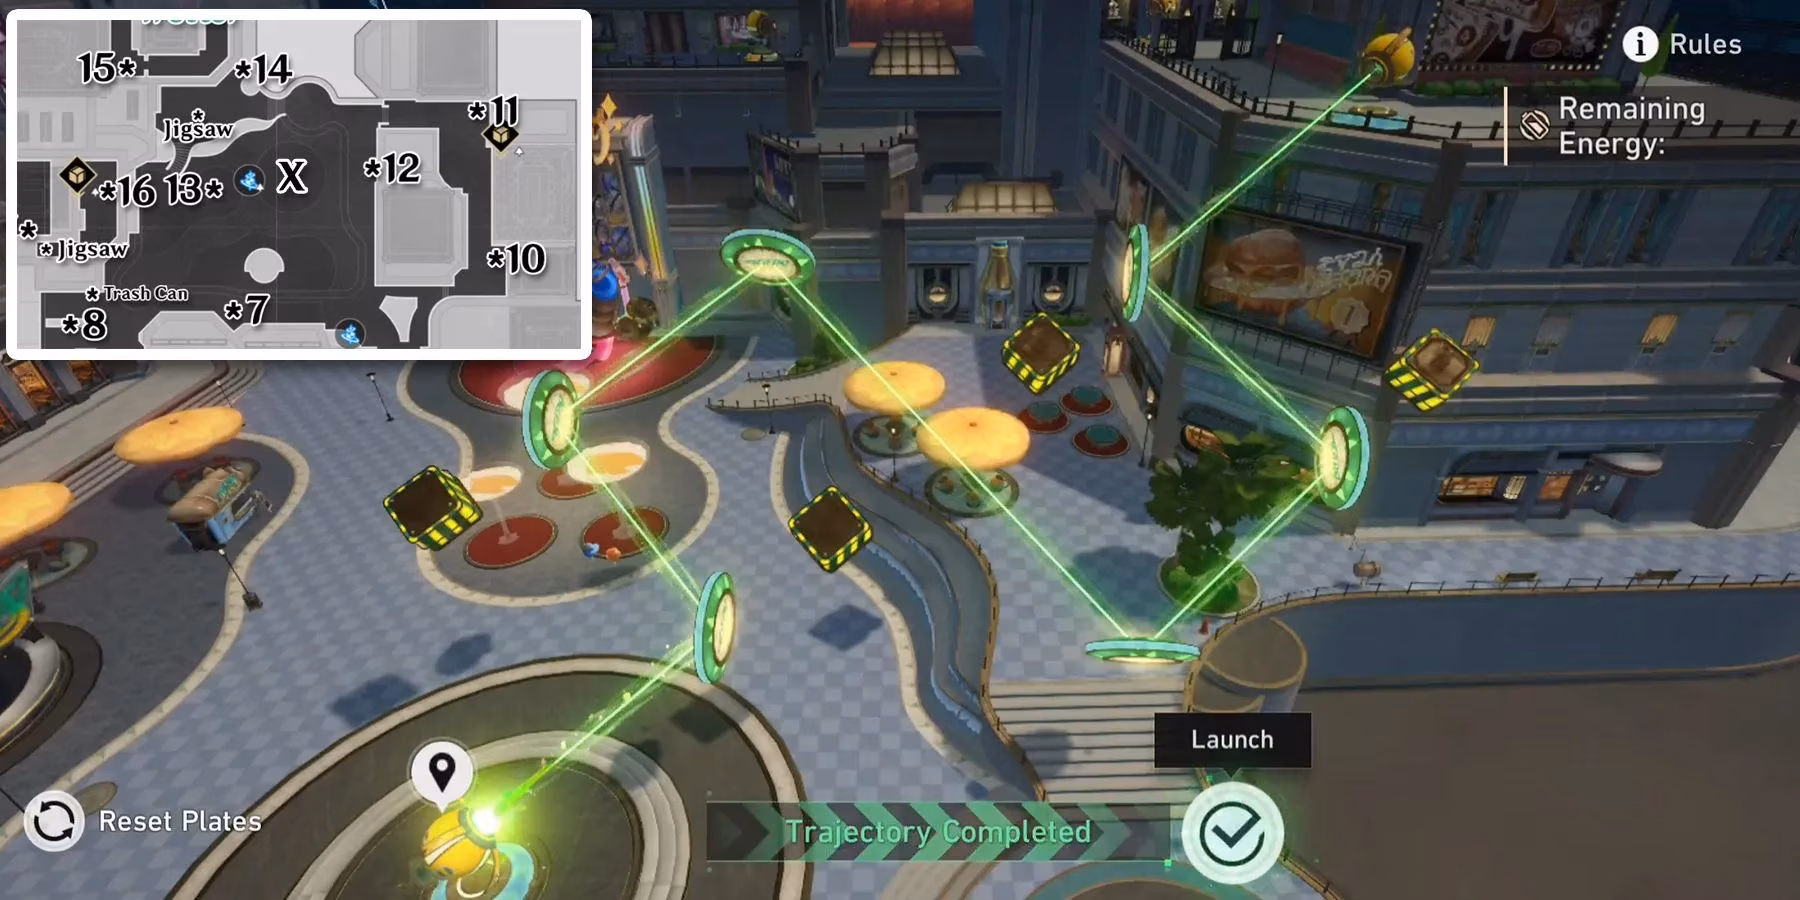
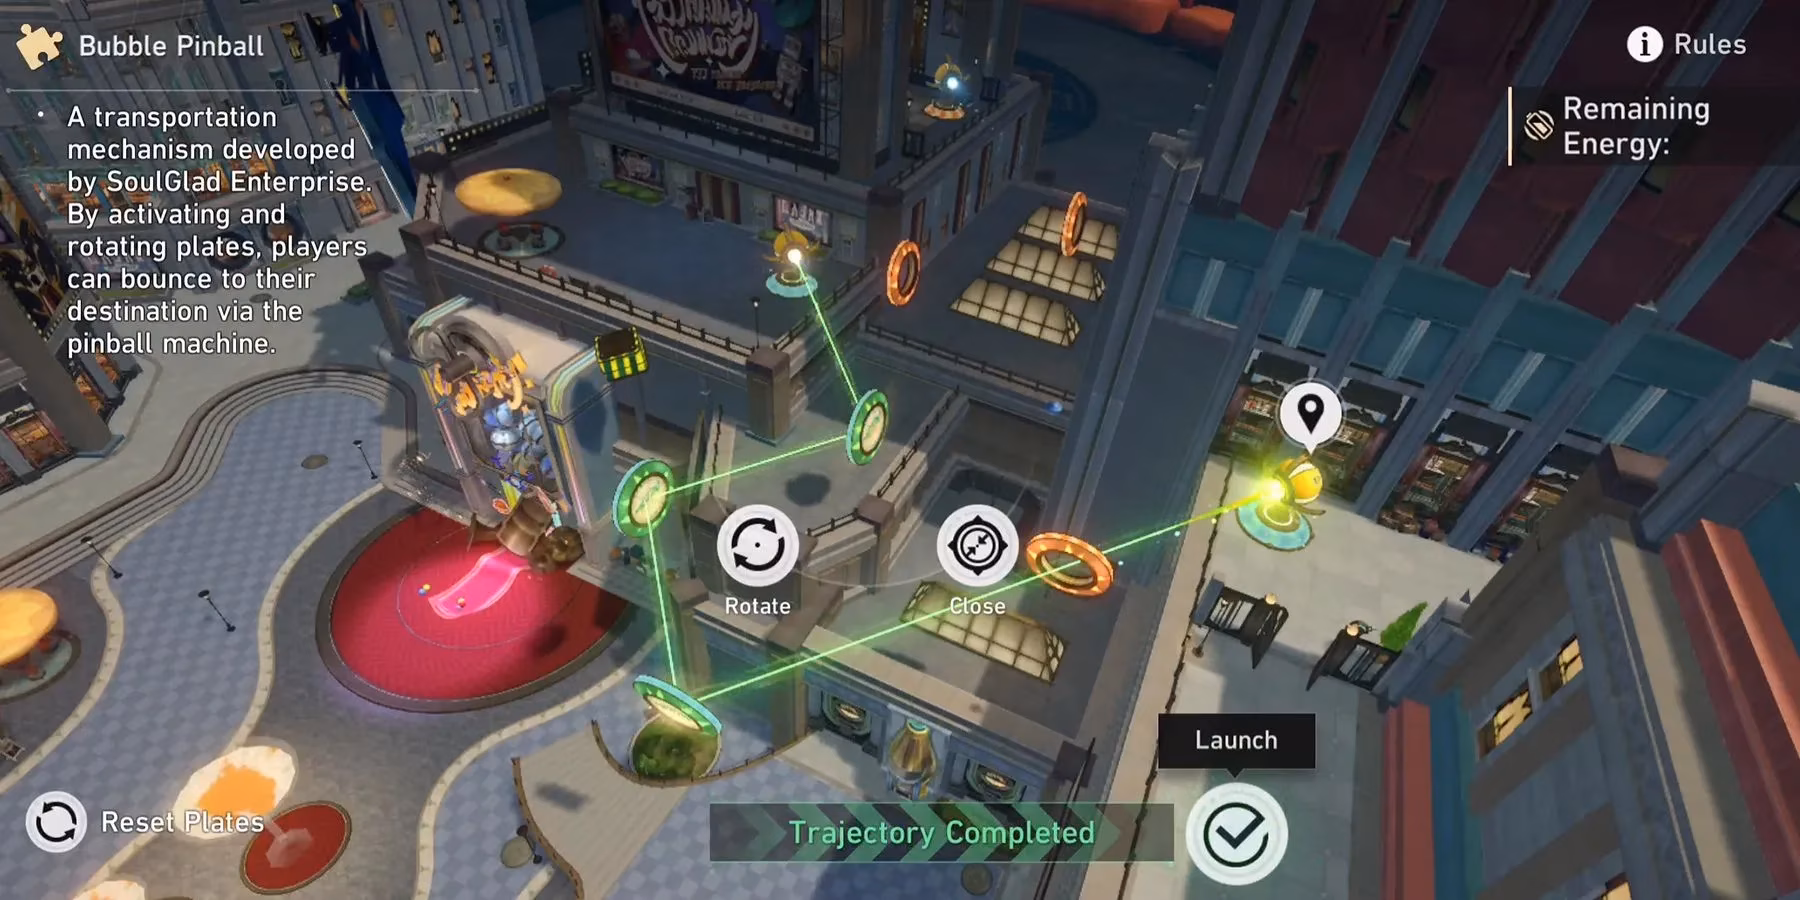
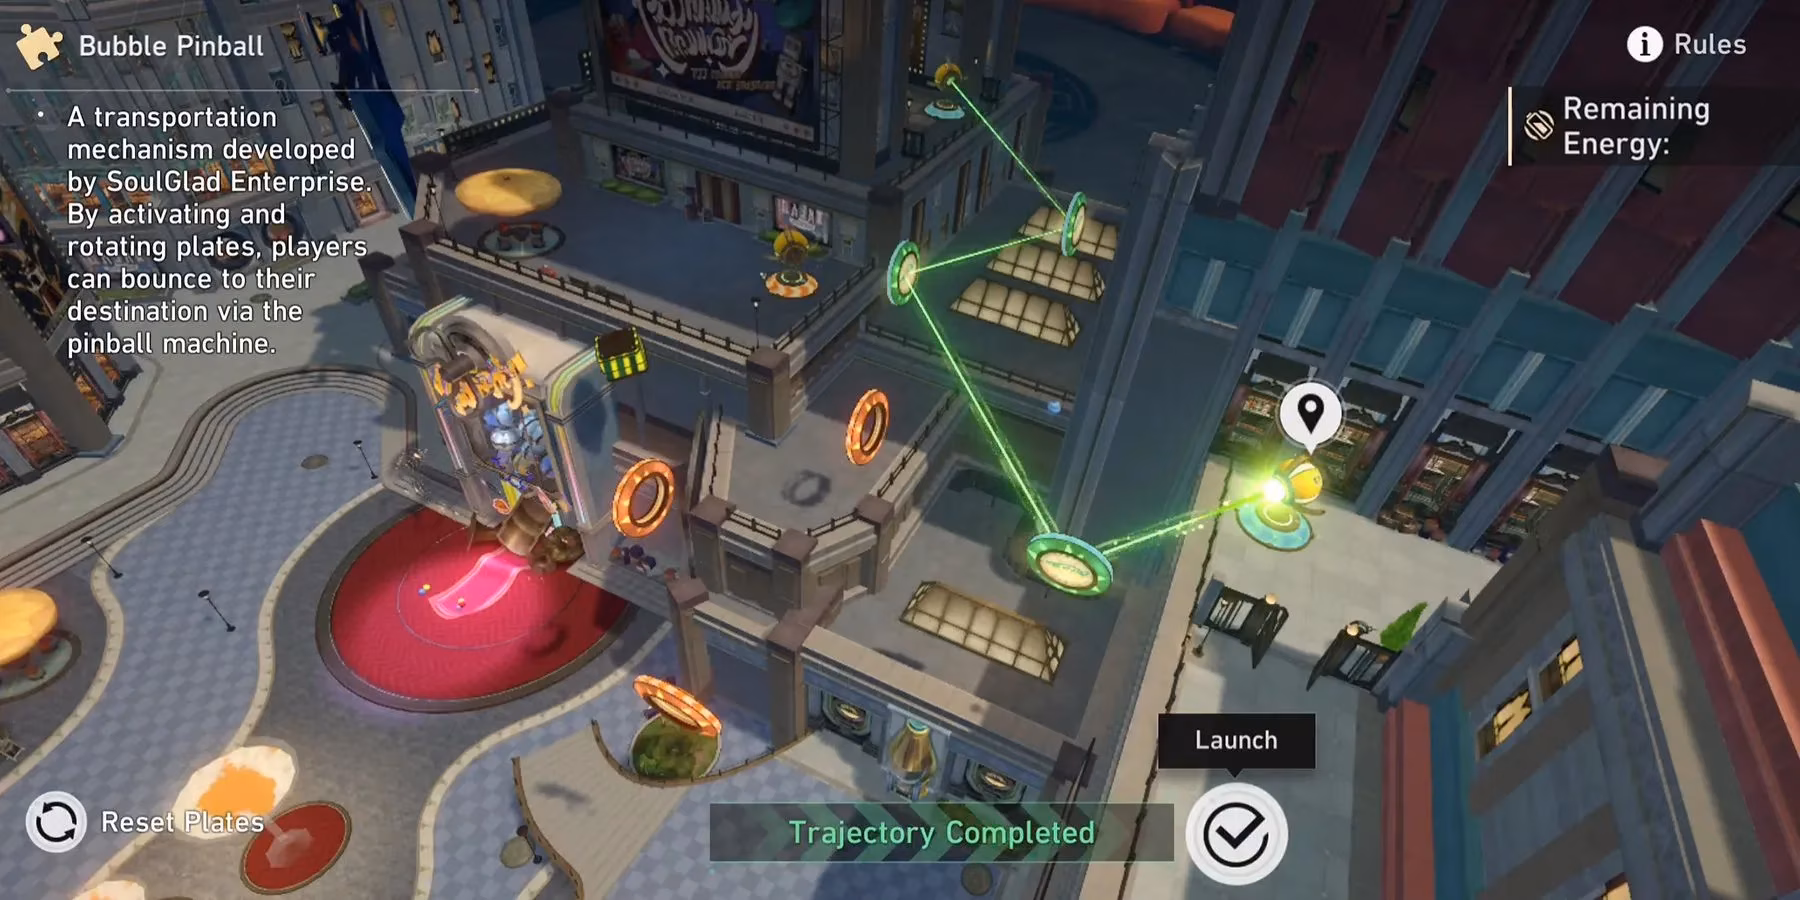
If the Bubble Pinball is giving you a headache, just copy the exact bubble placements you see in the screenshots above — first for getting to Chest #15, second for hopping from Chest #15 to Chest #16, and third for jumping from Chest #15 to Chest #17. Don’t overthink it.
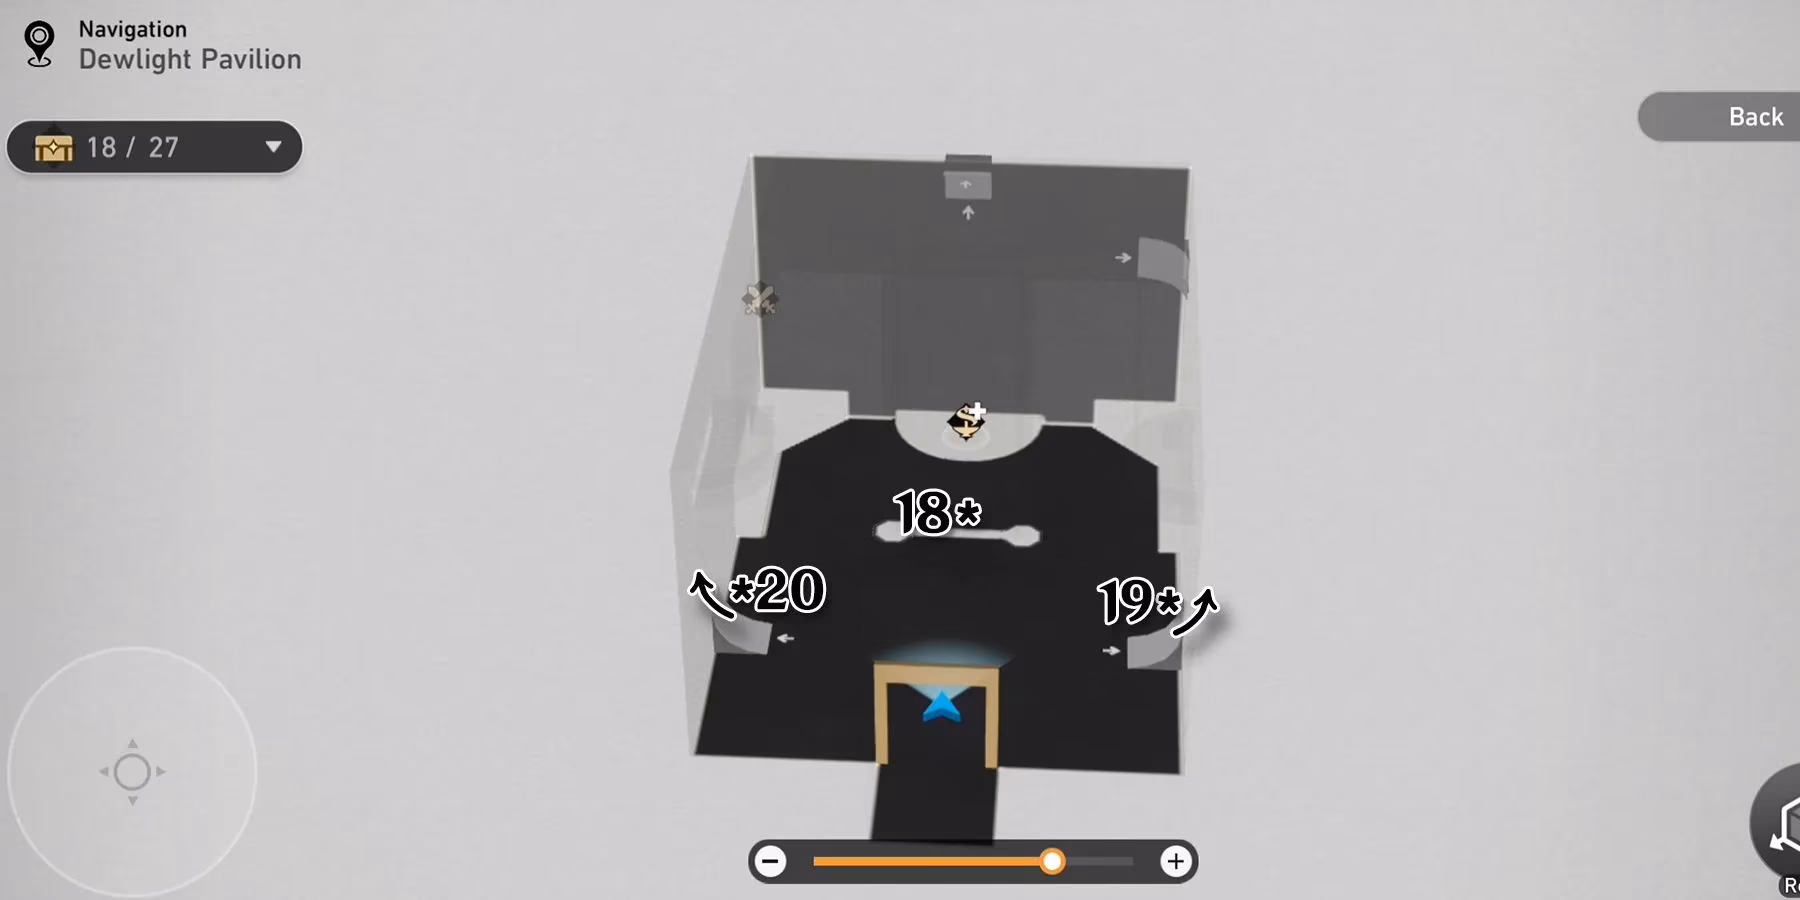
🧊 The Small 3D Room — Chests 18 to 20
Back in the main Dreammaster Hall area, you’ll find a door leading to a compact 3D room. This one is super straightforward. Walk in and immediately sneak behind the wall to grab Chest #18 and a Bubble Fountain. Now just use the two Bubble Bridges to reach Chest #19 and Chest #20. That’s it, door closed.
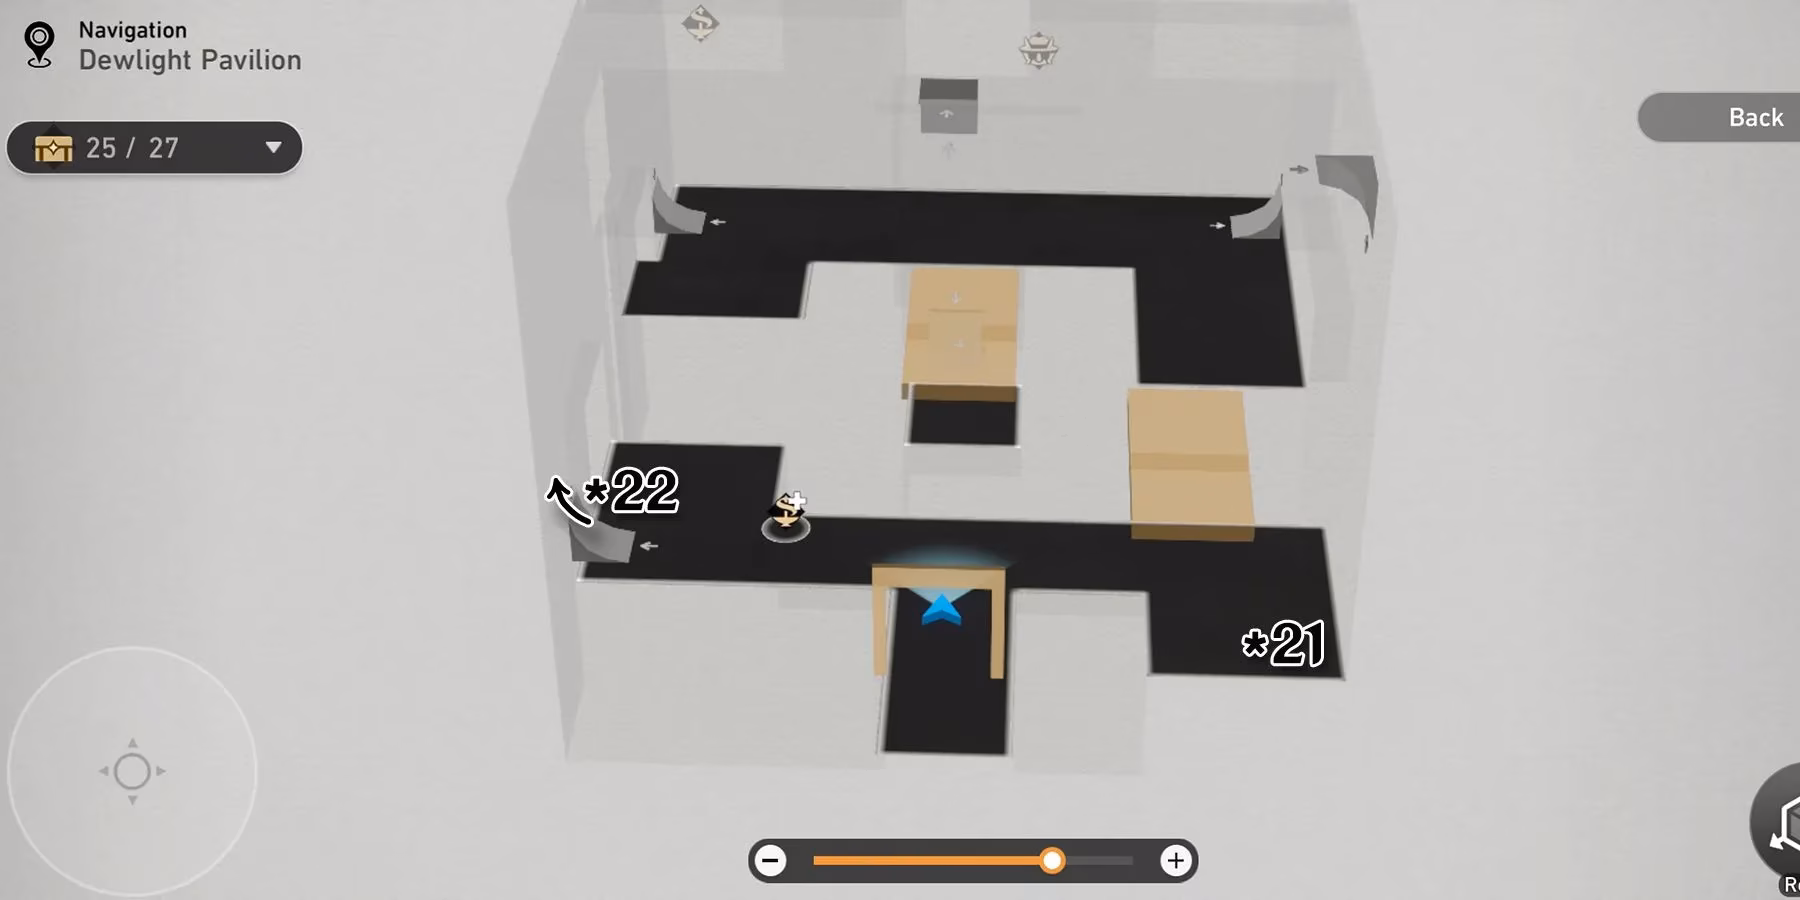
🌀 The Big 3D Room (West) — Chests 21 to 26
Oh boy, this is the room that separates the casual collectors from the completionists. You’ll find the entrance west of the Dreammaster Hall Space Anchor. Step inside and immediately turn right for Chest #21. Now grab some Bubble charges and activate the nearest Bubble Bridge. Cross it, and immediately turn left — there’s a sneaky hidden Chest #22 waiting.
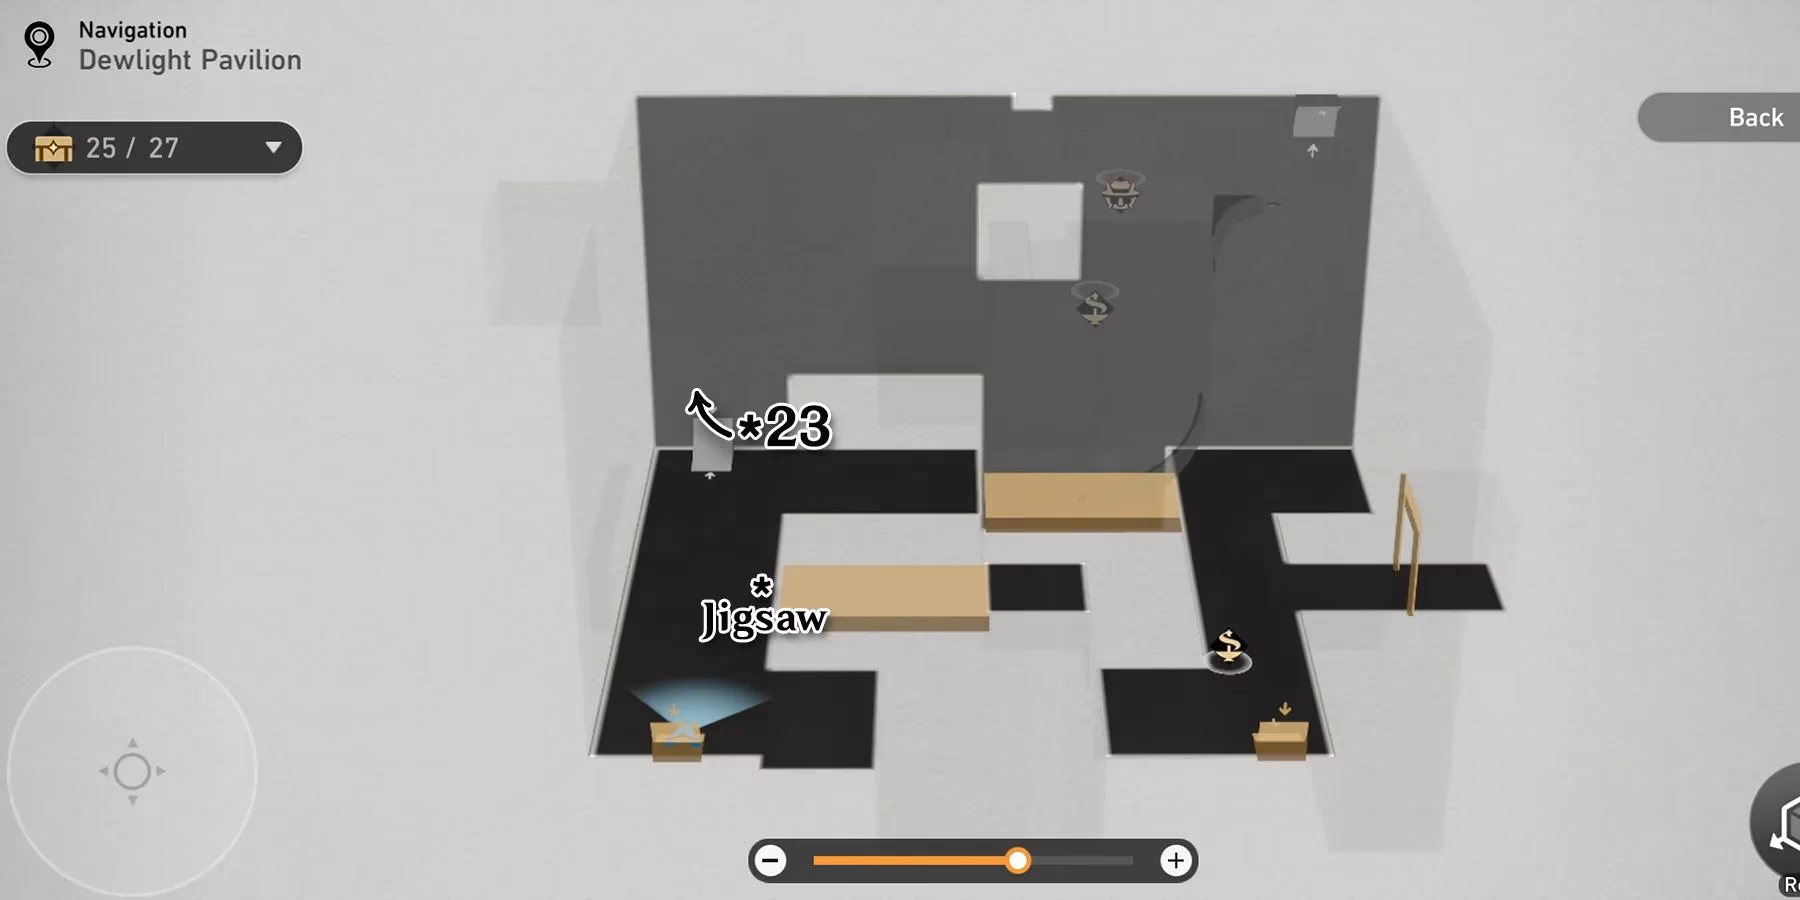
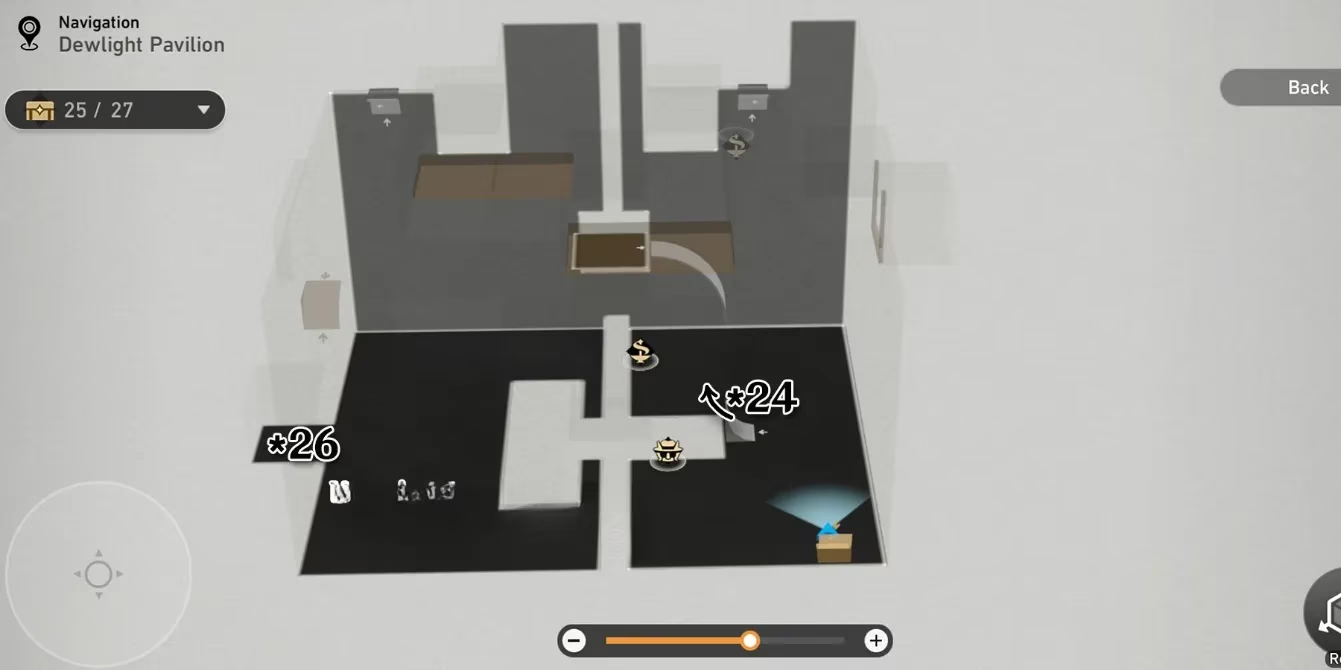
Head to the opposite end of the room and activate another Bubble Bridge. Complete the jigsaw puzzle there, cross back to refill your Bubble juice, then return to where the jigsaw was and power up the Bubble Bridge next to it. This is where things get spicy. As soon as you cross, turn right and beat down the enemies guarding Chest #23. Activate yet another Bubble Bridge (I know, it’s a lot) and you’ll land near a Hanu’s Adventure TV. Before you transform into Hanu, take out the enemy ahead and activate the Bubble Bridge to reach Chest #24 — this one’s easy to overlook.
Now transform into Hanu. Use the blue fantastic rocket launcher to cross to the other side, grab the rocket launcher weapon, and absolutely obliterate all enemies in the corridor. At the end you’ll find Chest #25. But we’re not done — destroy the fireworks in the same area to reveal a secret room with Chest #26. Very Hanu, very satisfying.
🚀 The Eastern 3D Room — Chests 27 & 28 (Requires Outsourcer Mission)
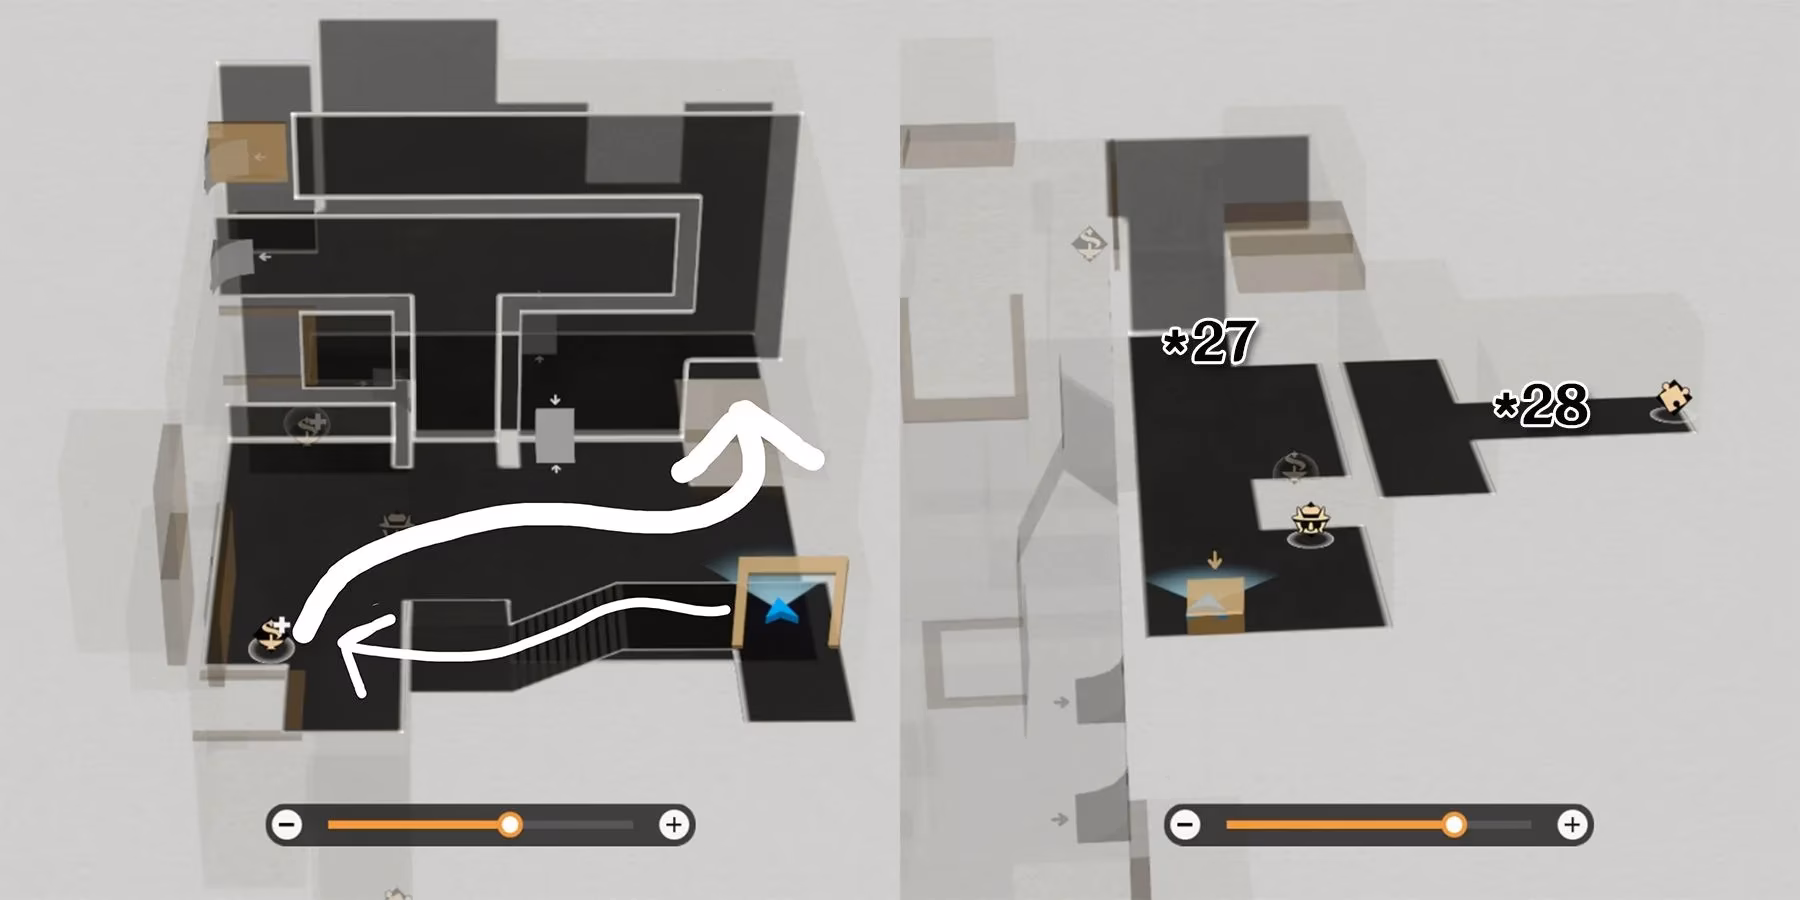
If you’ve been wondering why that eastern door won’t budge, it’s because it’s tied to the Outsourcer Adventure Mission. You need to progress to the third round of the mission before you can even dreamwalk into the Hanu’s Adventure TV inside. Complete the mission, then return to this door, enter, and turn into Hanu once you’re at the TV. Grab the rocket launcher, clear out the enemies, and Chest #27 is yours.
After the fight, look for a tiny hole in the wall. Squeeze through to the next area and blow up the fireworks to unveil hidden chambers. One of those chambers holds Chest #28, plus a Dream Ticker puzzle for some extra loot. This room is so well-hidden that half my friends missed it entirely on their first playthrough — don’t be like them.
🐷 Warp Trotter & 🗑️ Lordly Trashcan Quick Reference
Where’s the Warp Trotter? In the Sandpit. Find the Bubble Pinball machine roughly in the middle of the area, and use it to fly up to the pink pig’s hideout. Simple as that.
And now, the moment you’ve all been waiting for — the exact dialogue choices to avoid fights with the two Lordly Trashcans in Dewlight Pavilion. They’re weirdly philosophical, but I got you:
First Trashcan (near Chest #3 stairs)
- Question 1: What’s the appropriate thing to do when giving directions to a guest?
Answer: “I’ll keep my fingers together and point in the right direction with the tip of my palm.”
- Question 2: Imagine the VIP of The Family raising a toast to everyone, including you. How do you respond?
Answer: “I’d lower my glass when clinking it with theirs.”
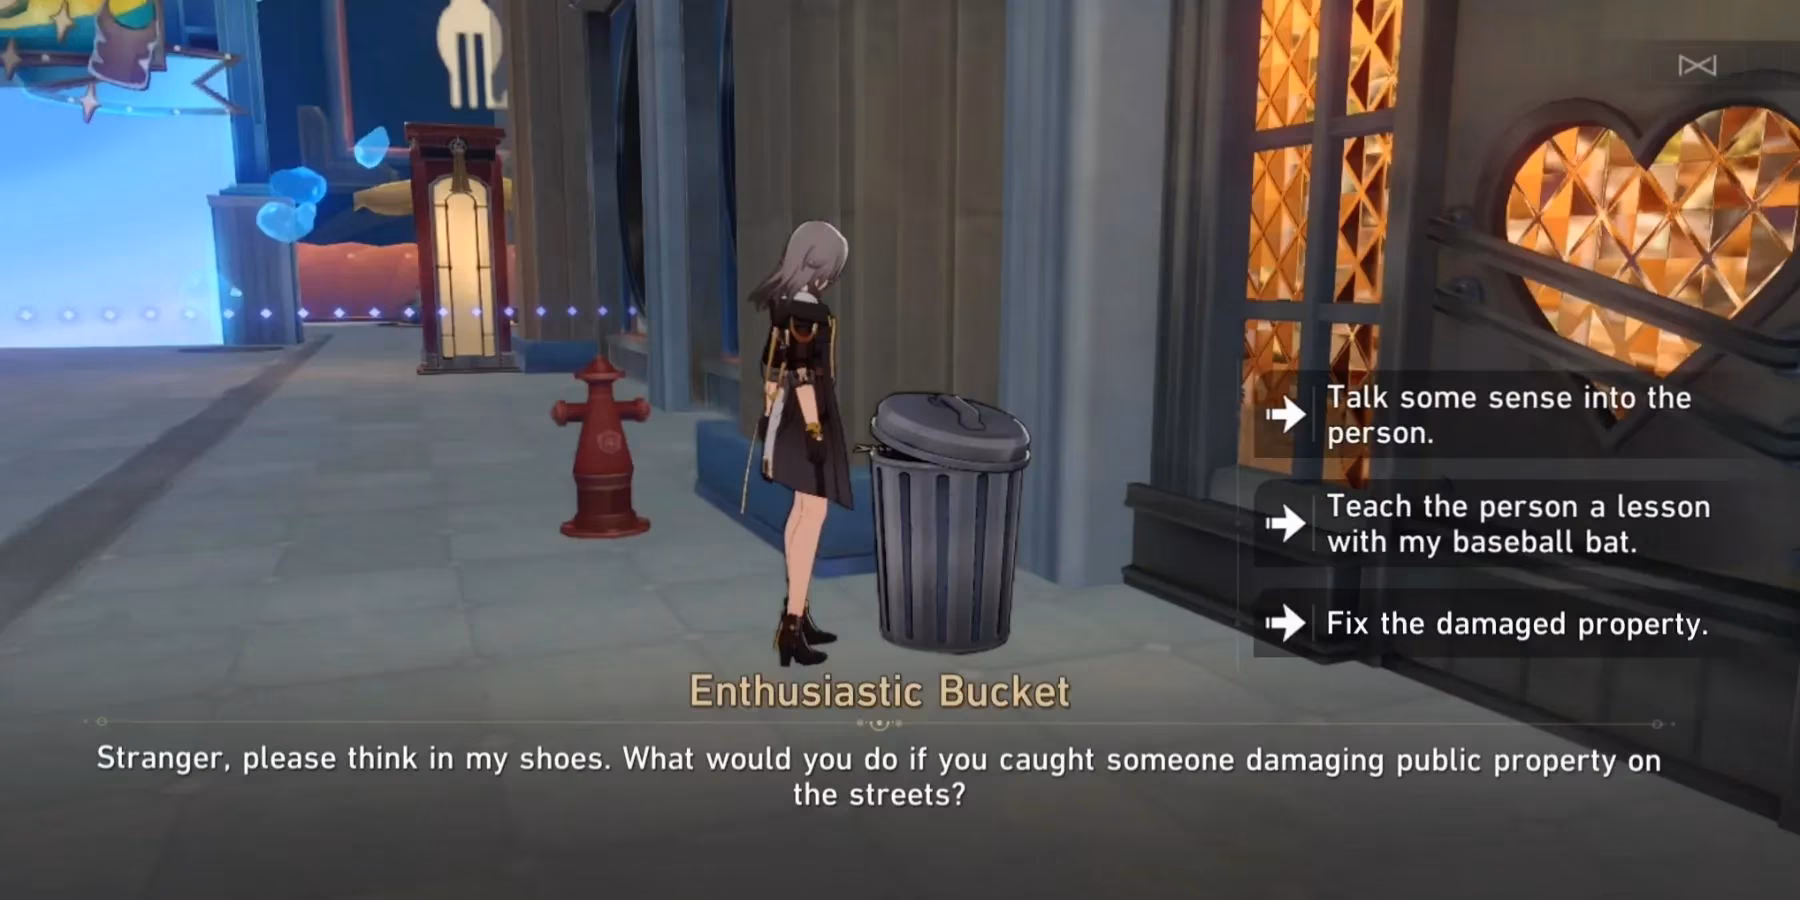
Second Trashcan (Sandpit, near Chest #8)
- Question 1: What would you do if you caught someone damaging public property on the streets?
Answer: “Teach the person a lesson with my baseball bat.” (Very Penacony, I know.)
- Question 2: If a Dreamchaser messed up the Charmony Festival due to an unintentional mistake, what’s the right move?
Answer: “We need to beat them up until they promise to never repeat the mistake!”
Stick to those answers and the trashcans will bow down peacefully without a scratch. Fighting them is a waste of time anyway — your DPS is better spent on Trotter-smacking.
Dewlight Pavilion used to give me nightmares, but now I can breeze through it with my eyes closed (well, almost). If you’ve followed this guide, your map should now be sparkling clean with all chests collected, the Trotter down, and your Stellar Jade reserves looking a lot healthier. See you in the next Dreamscape, Trailblazers! ✨